However I've found in my professional and freelance careers, that more and more clients would like some control with certain areas, such as adding a new phone number, or changing their logo. So obviously the first thing I looked into was using ACF (Advanced Custom Fields), however I know that having too many custom fields on a site can slow down it's performance. I also don't want to constantly rely on plugins for everything on my sites. So this is kind of a good way to do it, but why not use something that Wordpress already gives you?

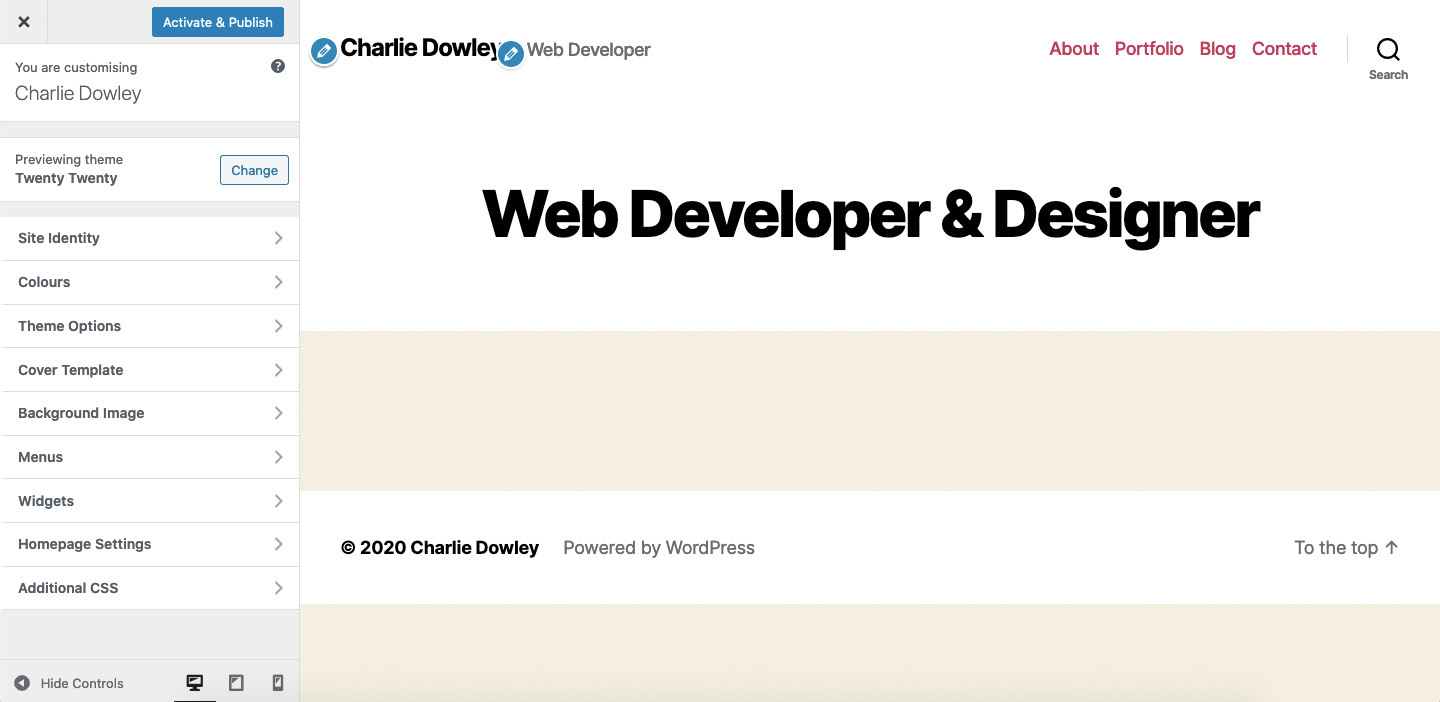
So this what you get with most themes in term of the customiser, it's very basic, and some of the options given you may not even want!
So we're going to go even deeper. First thing we need is a file to create our customiser settings, for example we can call this customiser.php and can we included anywhere in your theme folder. Then we just need to call that file from within functions.php.
PHP
/**
* Add Customiser
**/
require get_template_directory() . '/customiser.php';
The next step is adding something to the `Customiser` file. We'll go with adding a email address to the `Site Identity` section. So since this section is already registered, we don't need to add a new one, we just have to assign it.
PHP
// allow user to set their email
$wp_customize->add_setting('site_email');
$wp_customize->add_control(
    new WP_Customize_Control( $wp_customize,'email',
        [
            'label' => __('Email', 'Theme'), // Label to display
            'section' => 'title_tagline', // Which section this will live in
            'settings' => 'site_email', // Should match the setting given at the beginning
            'type' => 'email' // What type of field to display
        ]
    )
);
So you can see from the above, it's actually quite simple. This method can be used to add anything from a line of text, to an email, or a copyright message.
Wordpress gives you a number of types you can play with,
- text (default)
- checkbox
- radio (requires choices array in $args)
- select (requires choices array in $args)
- dropdown-pages
- textarea (since WordPress 4.0)
So as you can see, there are lots of different things you can do with `WP_Customize_Control`.
There is also a way to add image uploads to the customiser using the below code:
PHP
$wp_customize->add_control (
    new WP_Customize_Image_Control (
        $wp_customize, 'charlie_logo', [
            'label' => __('Main Image', 'Theme'),
            'section' => 'title_tagline',
            'settings' => 'charlie_logo',
        ]
    )
);
So you can see this is a simple way to give your client/user some freedom in adding their own information in any way you see fit. This also minimises your need to hard code something that is very possibly going to change at a time, which in turn gives you more time to come up with new and exciting ways to improve your sites and not interrupt your time for something small!


